

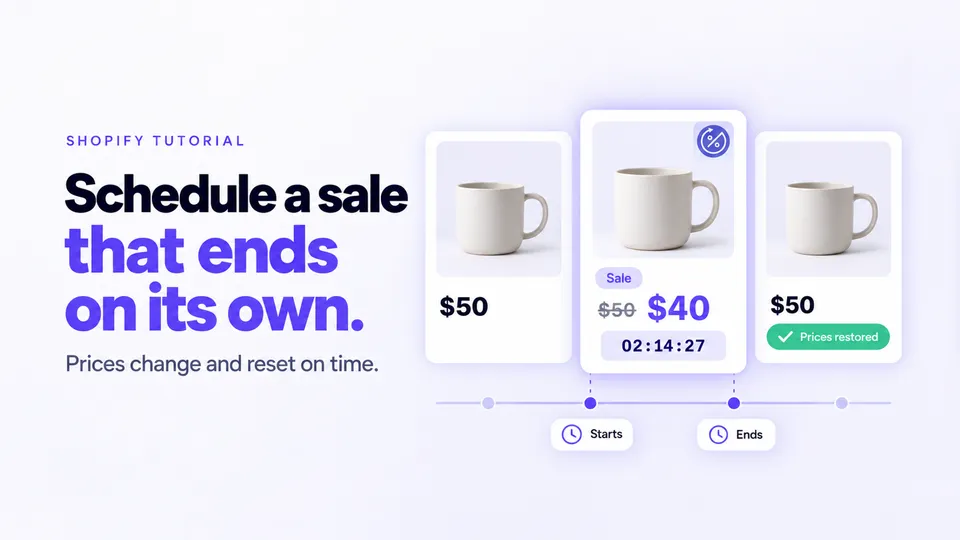
In Disco, click Create sale, choose the products and discount, and set the start and end date and time under Active dates. Disco changes prices at the start and restores them at the end, taking down the timer and banners. That's how to schedule a sale on Shopify so shoppers see the sale price before checkout; Shopify's scheduled automatic discounts apply only in the cart and at checkout.
In this guide
- Can you schedule a sale on Shopify without an app?
- How do you schedule price changes on Shopify?
- How do you schedule a Black Friday sale on Shopify?
- When should a Shopify Black Week sale start and end?
- How do sale prices change when the scheduled sale starts?
- How do you end a sale automatically on Shopify?
- Checklist before scheduling a Shopify sale
- FAQ
- Schedule the next one, then go to bed
Can you schedule a sale on Shopify without an app?
Partly. Shopify can schedule an automatic discount with Active dates, but shoppers see the saving only in the cart and at checkout. On the Basic plan or higher, a rollout Event can switch a catalog's prices on for a set period. Flow has no price action, and Launchpad is Shopify Plus only.
The difference is visibility. A scheduled discount applies at checkout, whereas a scheduled price change rewrites what the product page shows. Shopify's Help Center states that crossed-out prices on product and collection pages need a third-party app.
| Native option | What shoppers see | When it ends |
|---|---|---|
| Automatic discount (e.g. Amount off products) with Active dates | The saving in the cart and at checkout | Stops at its end date and time |
| Catalog Price adjustment + rollout Event (Basic plan or higher) | Catalog prices | Rolls back to the catalog's current prices; Shopify POS and product feeds can show the sale prices until their next sync |
| Shopify Flow: Scheduled time + Send Admin API request (a mutation you write yourself) | Whatever the mutation changes | Only if you build a second workflow |
| Launchpad (Shopify Plus only): product prices for an event | Sale prices across sales channels | Prices and compare-at prices go back |
If you run a cart-level offer or a discount code, you can schedule a sale on Shopify without an app: set the discount's Active dates, which follow your Shopify admin's time zone. For an app comparison, see our BFCM apps guide.
How do you schedule price changes on Shopify?
In Disco, you schedule the price change itself: a sale's Active dates set its exact start and end. Disco writes each product's sale price at the start, keeping the original as the compare-at price to show savings before checkout. When it ends, Disco restores the originals. Several sales can run at once.
In Shopify you can change Price and Compare-at price by hand or with the bulk editor, but neither has a schedule. A rollout Event can switch on a catalog's Price adjustment, but by default it lowers compare-at prices too, so a crossed-out original means setting compare-at prices manually. Disco resolves this by scheduling the product prices themselves and restoring them when the sale ends.
How to schedule price changes in Disco
- Click Create sale, then under Choose discount campaign type pick Same discount or Different discounts (a discount per product, from the Professional plan).
- Choose the products on the Include products tab: select All products, or Select products, collections, tags or types. To keep items at full price, use the Exclude products / collections tab (from the Lite plan). For a whole store or a collection, see how to put your entire store on sale.
- Set the discount: choose Percentage, Amount off or New price, and use Round to nearest for clean prices.
- Name the sale: Disco uses the name as the collection name, the sale page title and in the admin.
- Set the Active dates: enter the exact start and end date and time, weeks ahead if you like. Disco reads these times in your browser's time zone, not the store's (Settings > General), so if your computer is on another zone, convert them first.
- Add the storefront pieces: pick Show countdown timer on product page, and from the Lite plan the announcement bar's Show while the sale is active and Sale badges.
- Save it. Until the sale starts, you can still change its products and discount.
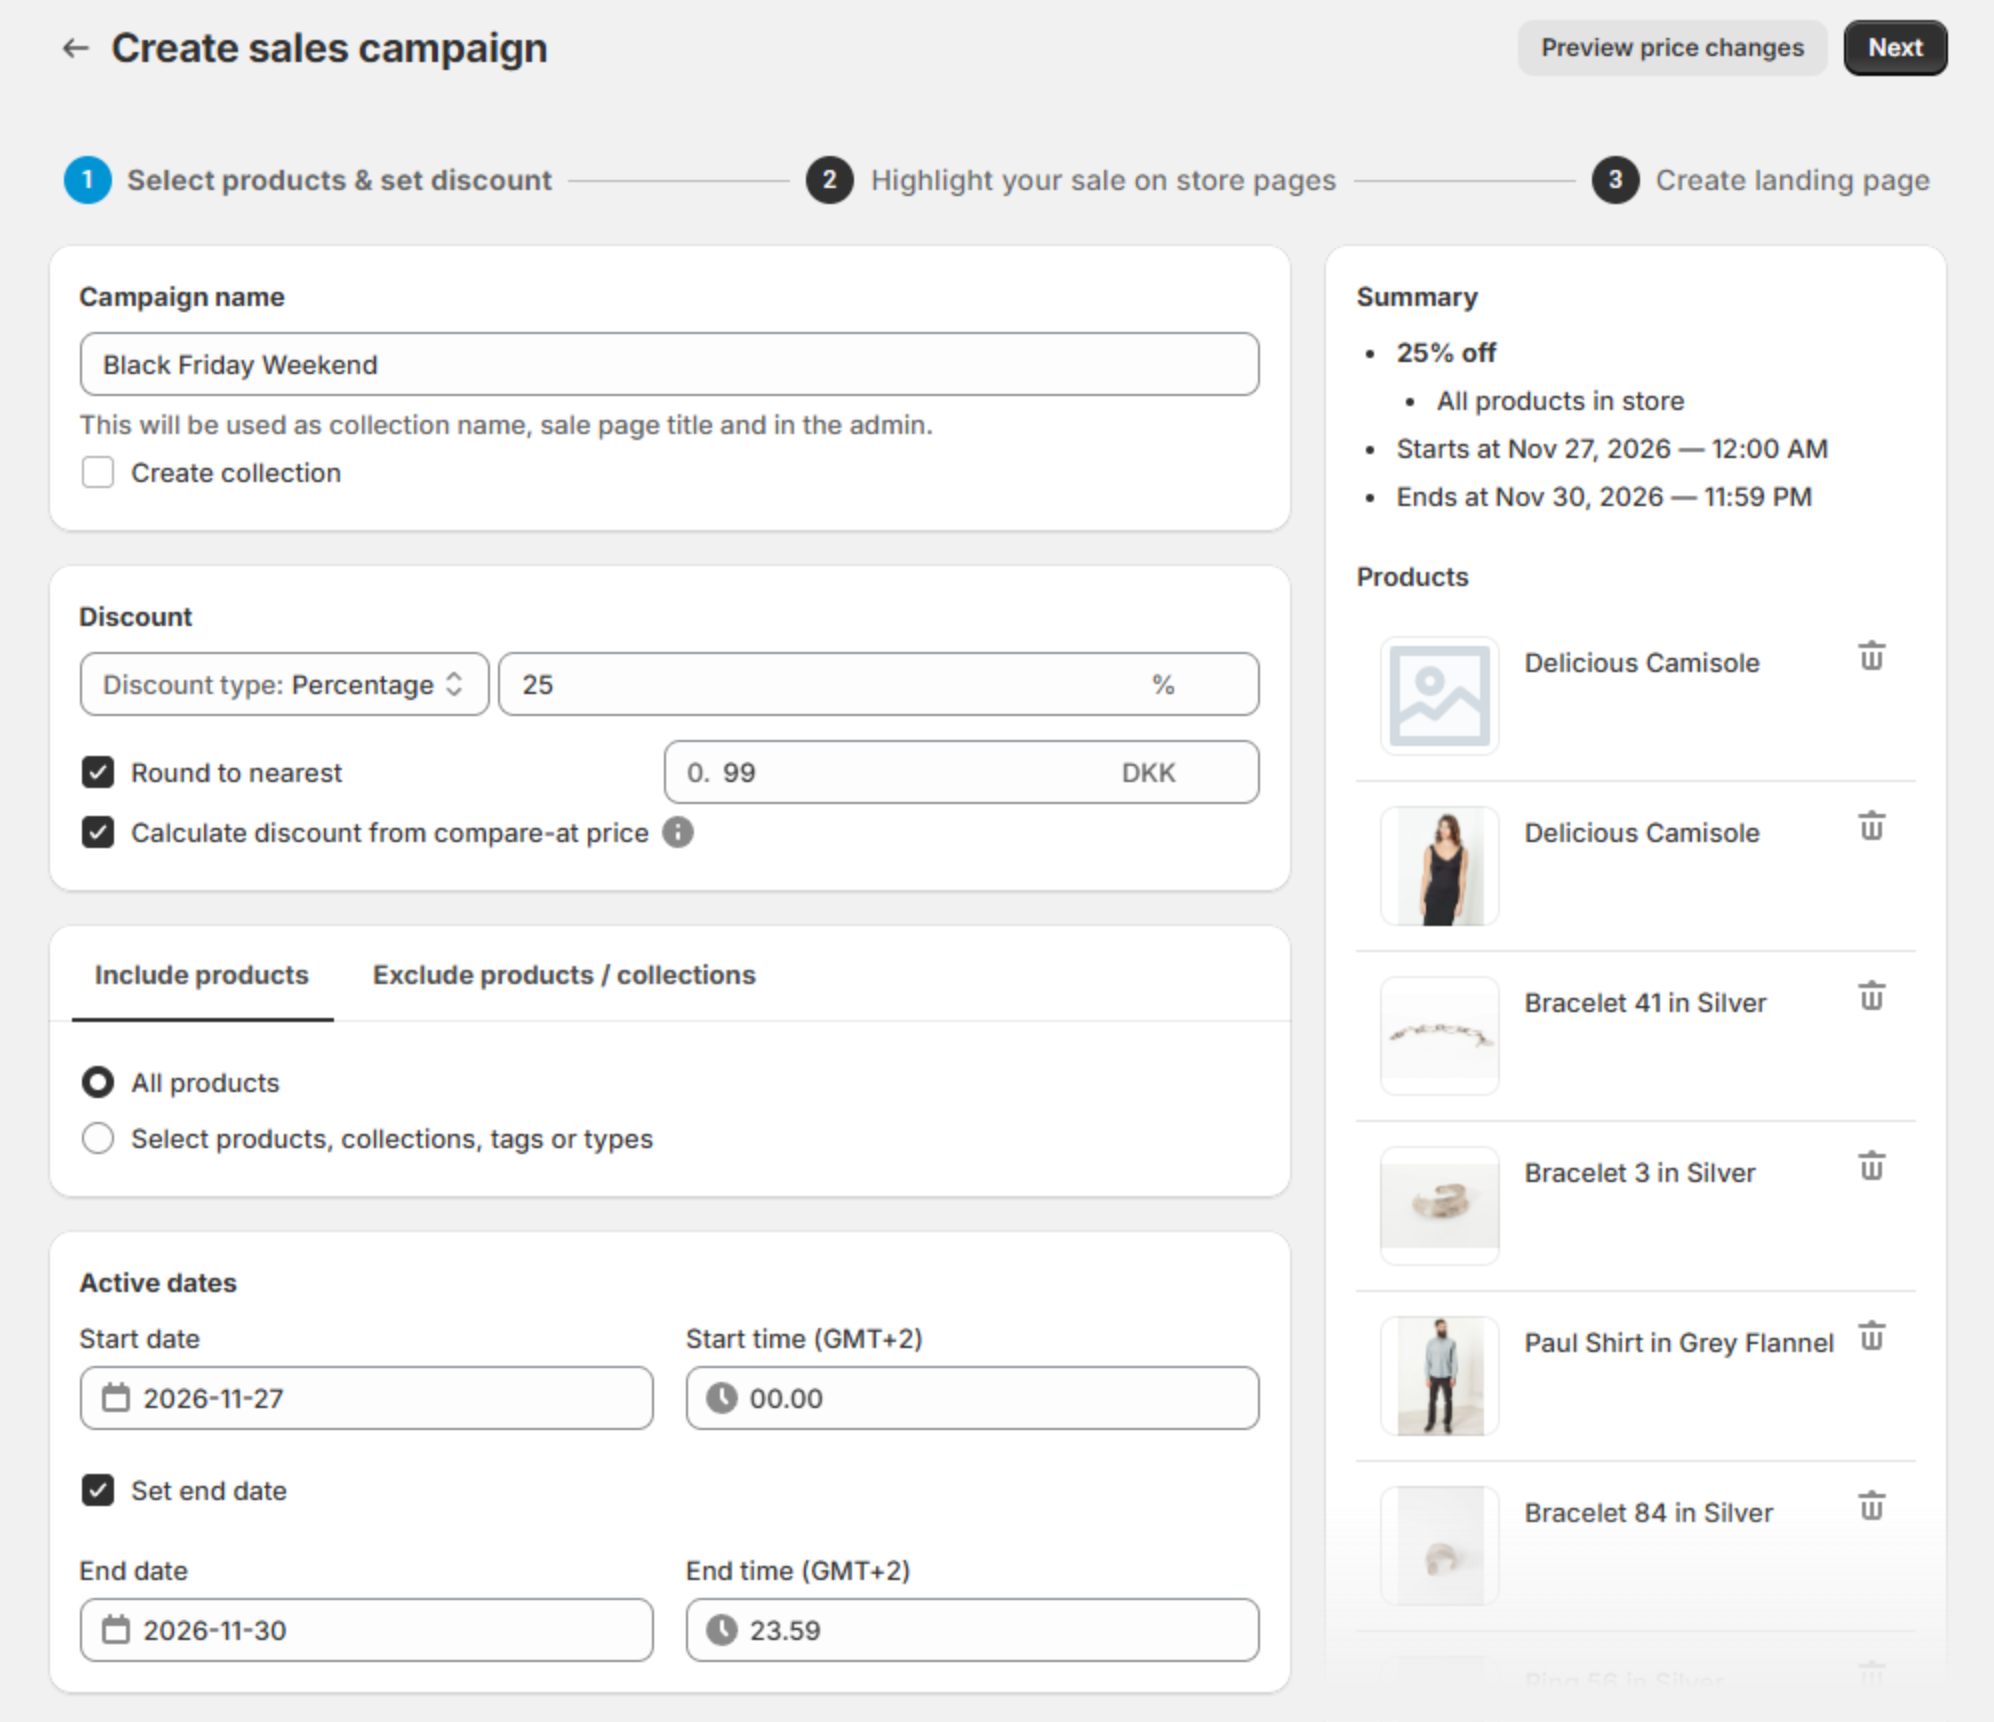
The free Starter plan schedules sales for up to 30 discounted products and 2 campaigns (compare plans). Help doc: create a sale on individual products.
How do you schedule a Black Friday sale on Shopify?
In Disco, create one sale with Active dates from Friday, November 27, 2026, 12:00 AM to Monday, November 30, 2026, 11:59 PM. Build it a week early and test it. Until it starts you can still change the products and discount. Disco ends it on time and restores every price.
In Shopify you can schedule an automatic discount under Active dates for the same window, but shoppers see the Black Friday saving only in the cart and at checkout. Disco resolves this by showing the Black Friday price on product and collection pages from 12:00 AM on November 27.
Here is an example schedule for a US store on Eastern Time.
| When (Eastern Time) | What happens | Where |
|---|---|---|
| By Friday, November 20, 2026 | Sale built and saved; a ten-product test sale passed | Disco: Create sale, Active dates |
| Before the start | Teaser bar announces the sale, with an email signup | Disco: Show before the sale starts (Lite plan and up) |
| Friday, November 27, 12:00 AM | Sale prices go live; timer, bar and badges appear | Disco, automatically |
| Friday, November 27, 12:05 AM | Launch email, after you check one product | Your email tool |
| Monday, November 30, 11:59 PM | Sale ends; prices restored; timer, bars and badges removed | Disco, automatically |
Plan in your store's time zone (Shopify Settings > General) and write it in the plan and the email tool. Disco's Active dates follow your browser's time zone, so convert them first or use a computer set to the store's zone. Customers in other zones see the sale go live at the same instant, at their own local time.
How to schedule a Black Friday sale in Disco
- Build the sale with the Active dates above.
- Tick Block discount codes on sale products in the Discount code blocking card (Business plan) so welcome and influencer codes don't stack on the Black Friday price.
- Turn on the announcement bar using Show before the sale starts with its Get notified! email signup (Lite plan and up).
When should a Shopify Black Week sale start and end?
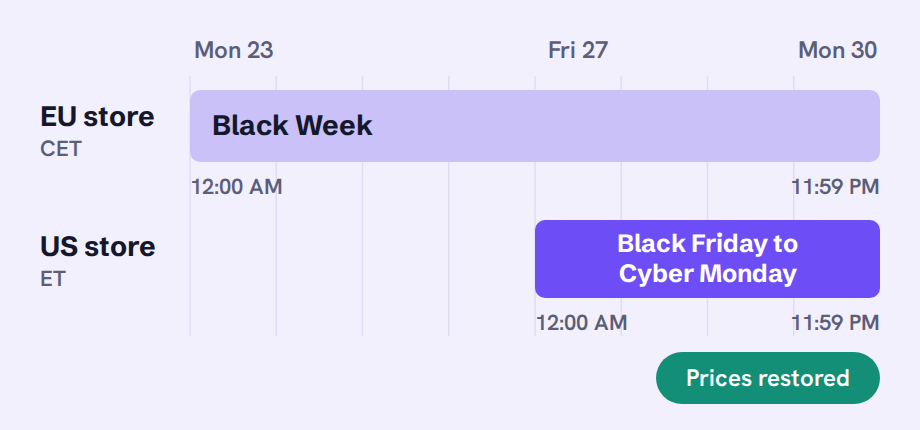
For an EU store, our example Black Week runs from Monday, November 23, 2026, 12:00 AM CET to Monday, November 30, 11:59 PM CET. In Disco that is one sale with those Active dates. For a deeper Black Friday price, add a second sale on the same products from November 27: the higher saving applies.
In Shopify you can schedule two automatic discounts with Active dates, one from November 23 and a deeper one from November 27, but shoppers see either saving only in the cart and at checkout. Disco resolves this by showing the Black Week price, then the deeper Black Friday price, on product and collection pages, with the original struck through.
If you sell to customers in the EEA, a price reduction must show the lowest price you charged in the 30 days before it. For a November 23 start that window opens October 24, so leave those products' prices alone from then. See our Omnibus Directive on Shopify guide for country rules and deepening sales.
How to run a Black Week sale in Disco
- Create the Black Week sale, for example 20% off with Active dates Monday, November 23, 12:00 AM CET to Monday, November 30, 11:59 PM CET.
- Add a Black Friday sale on the same products, for example 30% off, from Friday, November 27, 12:00 AM CET to the same end. Where two sales cover one product, the discount with the highest saving applies.
- Set the timer and bar on the Black Friday sale: when both sales have widgets on a product, the widgets of the sale that started last apply.
Both sales fit the free Starter plan's 2 campaigns.
How do sale prices change when the scheduled sale starts?
At the start time Disco writes the sale prices to every selected product and variant, switches on the timer, bar and badges you chose, and publishes the sale page if you use one. Spend five minutes checking one product, one variant, one excluded product and the checkout.
At the scheduled moment, Disco:
- writes the new sale price to Price and the original price to Compare-at price on every selected product and variant, so shoppers see the sale price, with the original struck through, on product and collection pages before checkout;
- switches on the storefront elements you chose: badge, countdown, announcement bar;
- makes the sale collection available and, on plans that include it, publishes the flash-sale page; and
- blocks additional discount codes, if you enabled that.
Your job at this point is a five-minute spot-check, ideally in an incognito window so you're not looking at a cached page:
- Open one product from the campaign. Confirm the strikethrough, the sale price, and the badge.
- Open a product with several variants. Check a variant that isn't the default.
- Open a product you excluded. Confirm it's still at full price.
- Add a sale item to the cart and go to checkout. Confirm the price carried through and behaves the way you decided with any live discount code.
- If you sell in more than one market, repeat step 1 in a second market.
If everything checks out, close the laptop. That's the point.
How do you end a sale automatically on Shopify?
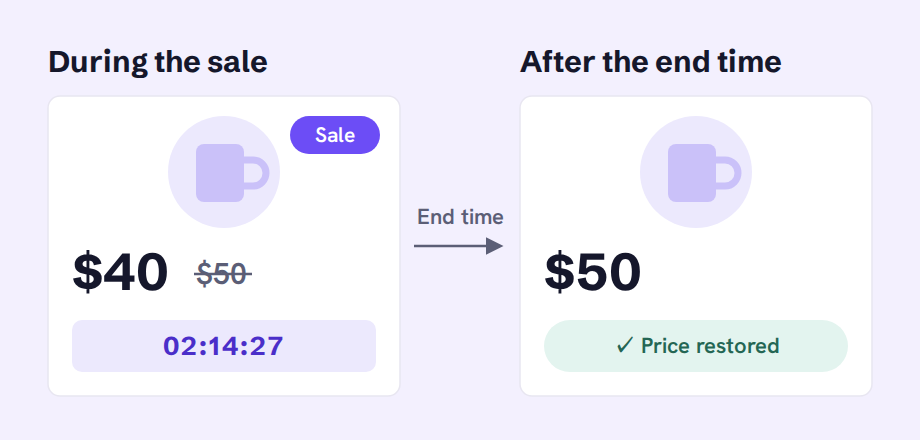
In Disco, the end date and time under Active dates ends the sale for you. Disco restores the prices saved before the sale started. The countdown timer, announcement bar and sale badges disappear, and the sale page comes down. Nobody has to be at the laptop at 11:59 PM.
In Shopify, an automatic discount stops at its end time, and a rollout Event rolls its catalog back. Prices you lowered by hand or with the bulk editor stay low until someone changes each one back. Disco resolves this by restoring every price it changed, on time.
Here is what happens on the storefront.
| On the storefront | During the sale | After the end time |
|---|---|---|
| Price | Sale price, original struck through | The price saved before the sale |
| Countdown timer | On product pages | Hidden |
| Announcement bar (Show while the sale is active) | At the top of every page | Gone |
| Sale badges | On sale products | Gone |
| Flash sale page | Live | Taken down |
| Tag from Autotagging | Added | Removed |
| Discount codes on sale products | Blocked, if you turned it on | Allowed again |
How to end a sale automatically in Disco
- Set the end in Active dates before the sale starts.
- Move the end of a running sale with What do you need to edit? → Edit Promotional widgets or End date only; the sale keeps running.
- Leave prices alone while it runs. Disco restores the price saved before the discount was first applied, so a manual price change made during the sale is overwritten at the end. Make permanent price changes before or after.
- Stop it early if you must with the Stop icon in the Discount overview, and wait until it has fully deactivated; the prices go back then.
If a price is wrong after the end, check whether another app wrote to the same price fields after Disco, before you edit anything by hand. Read why sale prices revert to investigate.
Checklist before scheduling a Shopify sale
Run through this the day before your first real campaign, and keep it for every one after.
- Run a test campaign first. Ten products, 30 minutes, tomorrow morning. Watch it start, check the storefront, watch it end. The free plan is enough for this.
- Time zone confirmed. Store time zone checked in Shopify; start time chosen accordingly.
- Price-syncing apps paused or scheduled around the sale. ERP, inventory, PIM, supplier or print-on-demand, currency, and CSV/bulk tools can all write to the same price fields. Shopify keeps the most recent write, so an hourly ERP sync will quietly undo your sale an hour in. Disable price sync for the window, exclude the campaign products, or move the sync job to before the start. Your Shopify sale price keeps reverting? If you use compare-at prices, this is probably why covers how to find the culprit.
- Exit plan. You know how to deactivate the campaign, and someone is reachable if a customer reports a wrong price.
FAQ
How to schedule a sale on Shopify for free?
Disco's free Starter plan includes scheduled sales, for up to 30 discounted products and 2 campaigns.
Can you schedule price changes on Shopify for a single variant?
Yes, in Disco with Different discounts: clicking Edit variants on a product discounts only the variants you select. Different discounts is available on the Professional plan and up.
How to end a sale automatically on Shopify before its end date?
Change the end date with Edit Promotional widgets or End date only, or stop it using the Stop icon in the Discount overview. Disco restores the prices once it has fully deactivated.
How to schedule Black Friday sale on Shopify across time zones?
Plan in your store's time zone (Settings > General). Disco's Active dates follow your browser's time zone, so enter them from a computer set to that zone (or convert them); shoppers everywhere see the sale go live at the same instant, at their own local time.
Does a Shopify Black Week sale change your "was" price in the EU?
If you sell to the EEA, the reduction must show your lowest price from the previous 30 days. For a November 23 start, keep those prices unchanged from October 24.
Schedule the next one, then go to bed
Give your next sale a start time and an end time you can leave to Disco. Begin with ten products and a 30-minute test tomorrow morning. Once you've checked the launch and reset, reuse the setup for your next campaign.
Install Disco from the Shopify App Store →
For plan limits and pricing, see our current plans.
Next: How to put your entire Shopify store on sale (without CSV) applies the same scheduled campaign to a large catalog, and The 2026 BFCM playbook: plan your biggest sale months ahead turns it into a full Black Friday plan.